
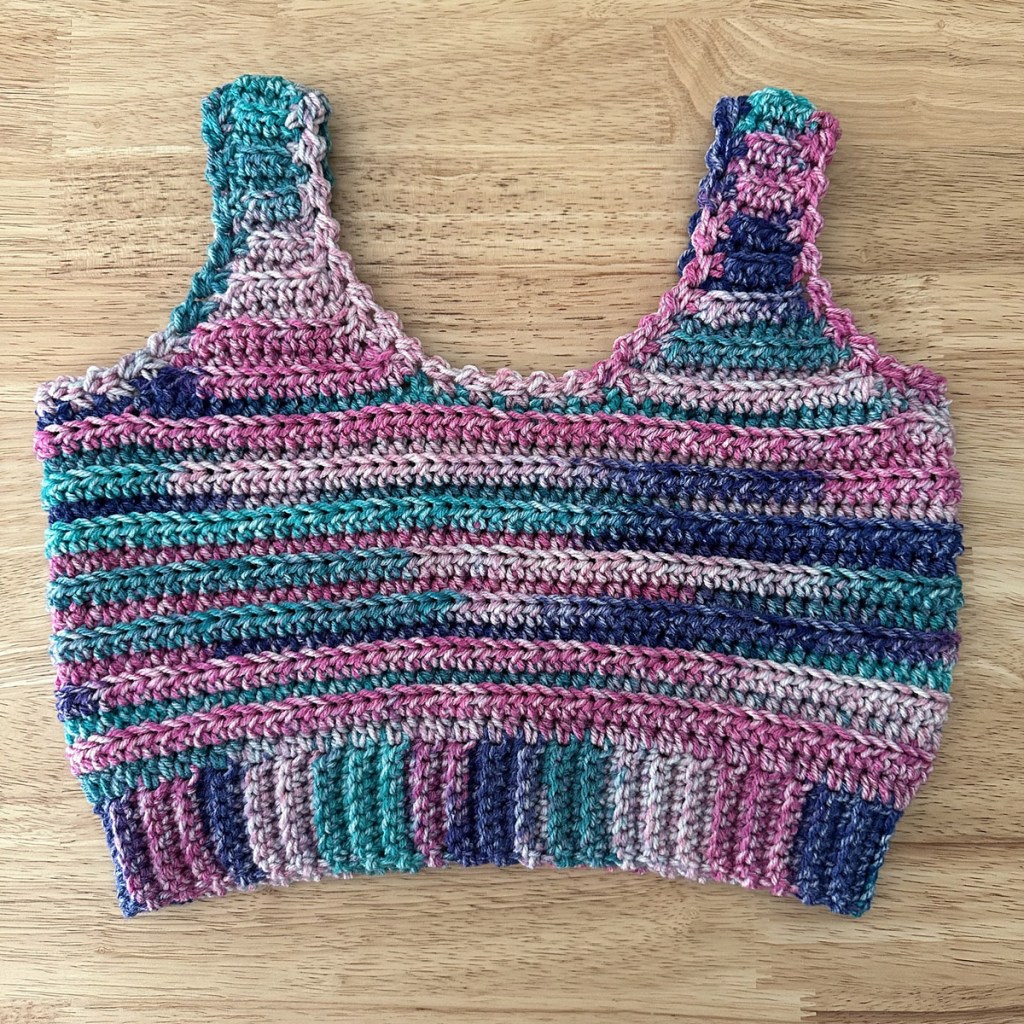
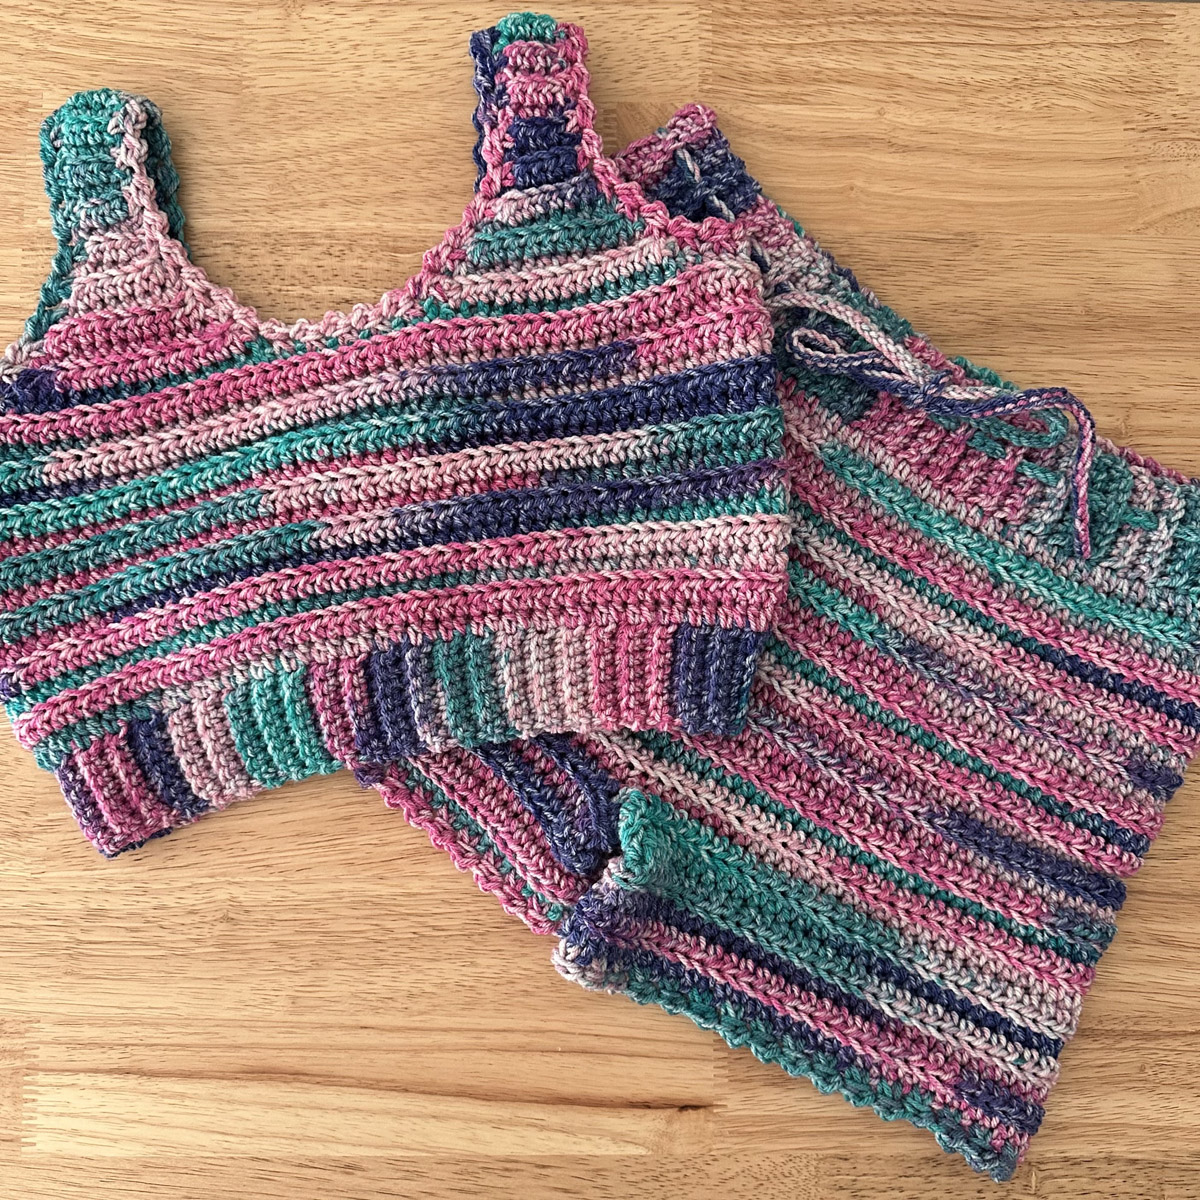
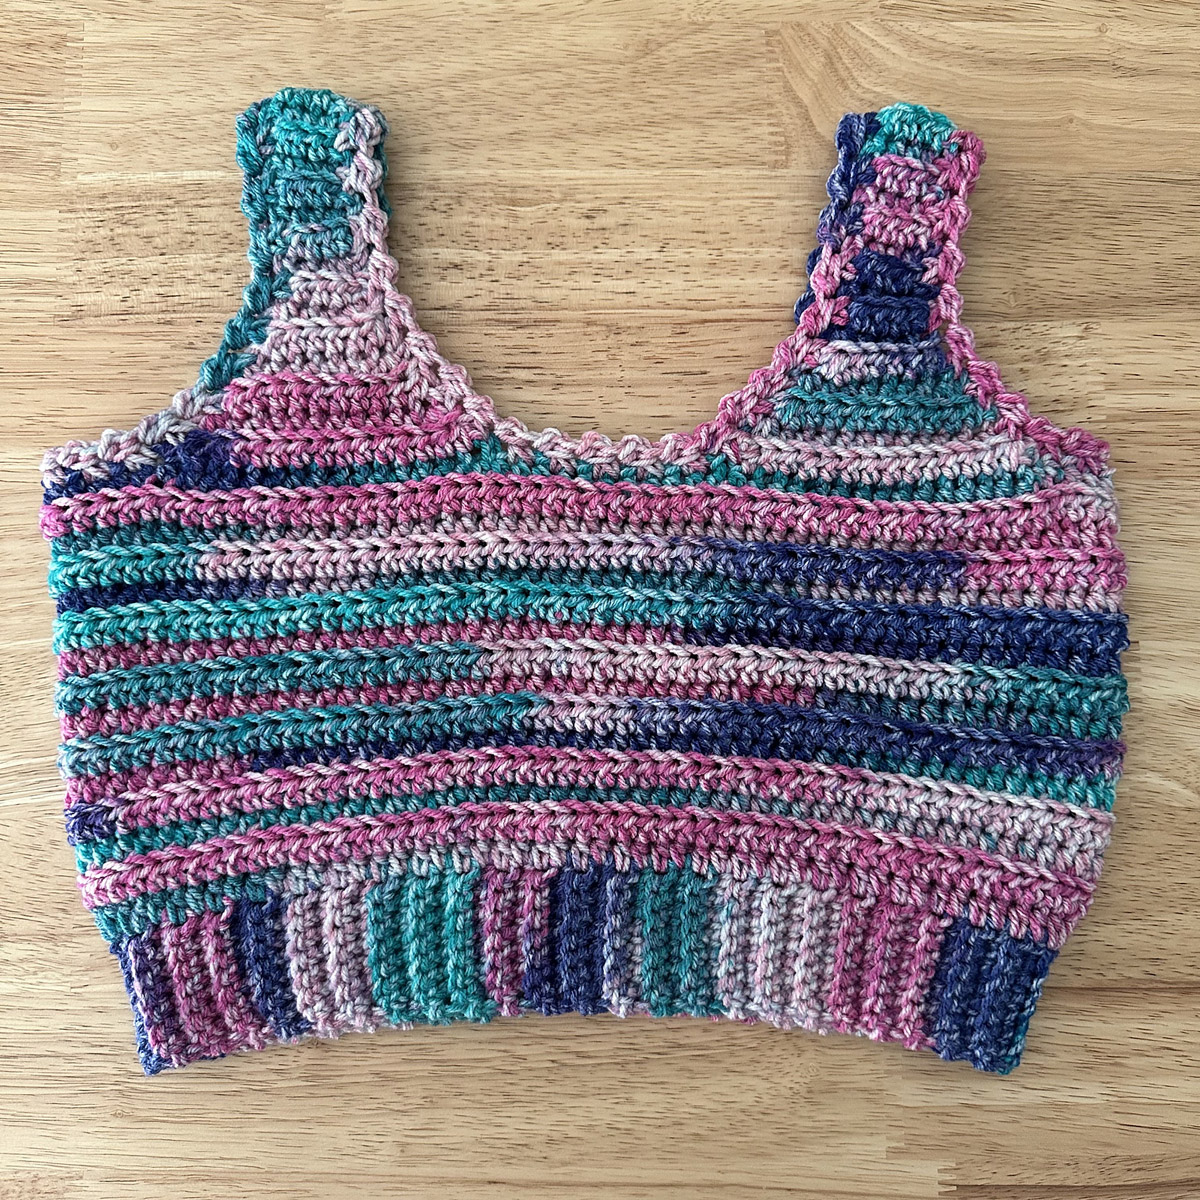
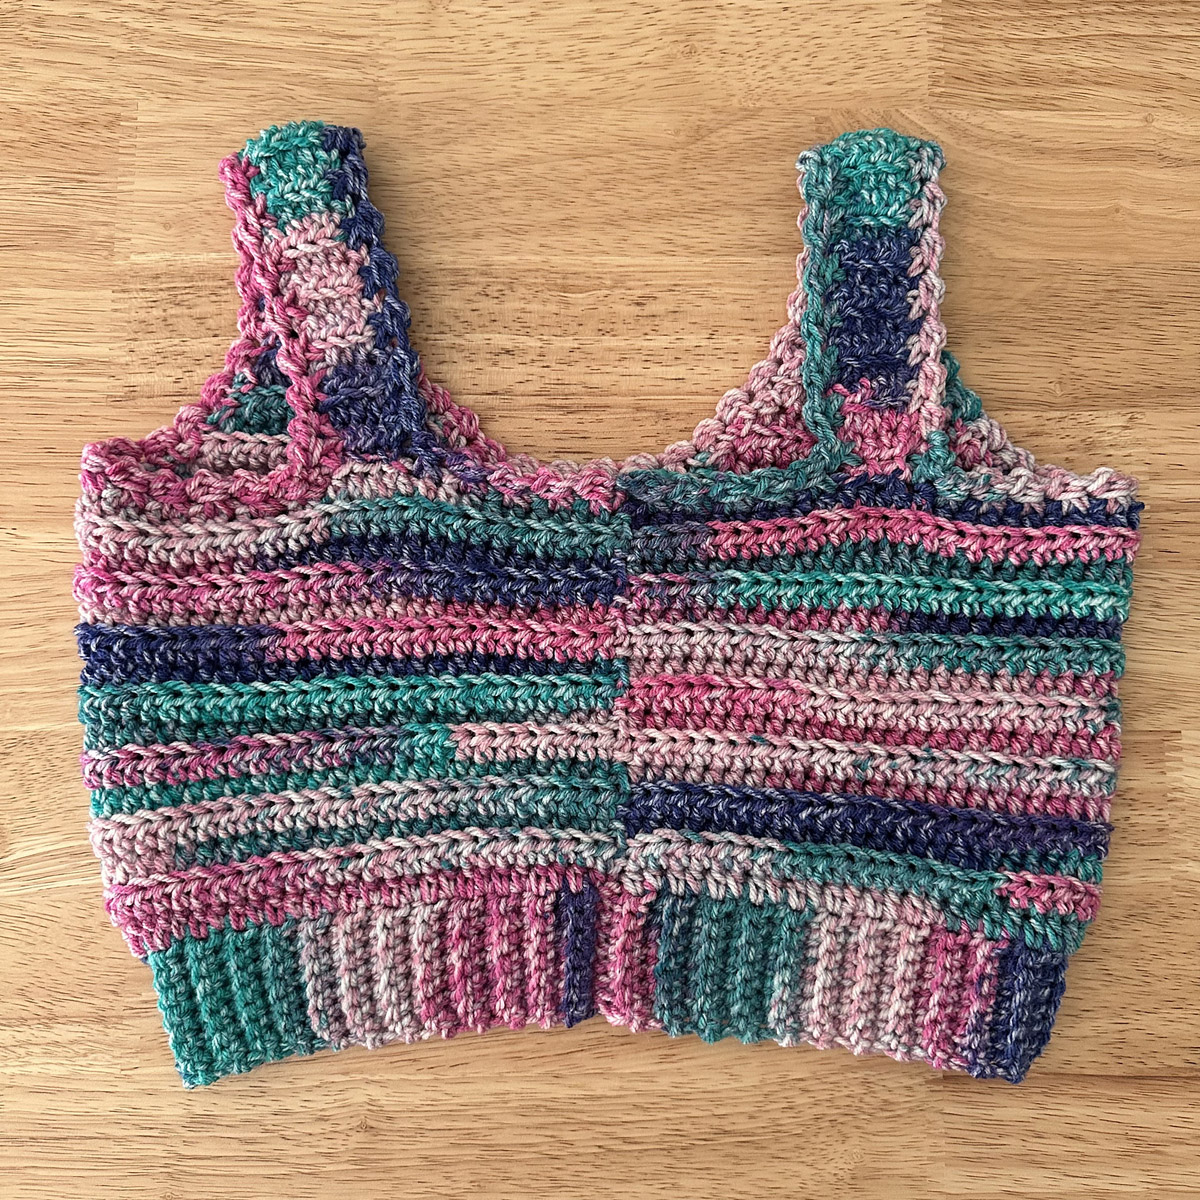
This is part two of a two part post that details how I freehand crocheted this shorts and cropped top set without a pattern. As I mentioned previously, this is NOT an official written pattern as I’m just learning how to write one, but I will detail the steps as best as I can. This is the tutorial for the cropped tank top. This is a little more difficult than the shorts and is not a beginner friendly pattern. You will need some crochet knowledge such as crocheting in the back loop only and making decreases. Experience making garments to measure is helpful. If I write a true pattern for these in the future, I will update this post.
You will want to try on this top as you go to ensure a proper fit to your own measurements. I tried this on many times.
- Yarn used: Hobby Lobby I Love This Yarn in the color Day Dreamery
- Hook size: 5.5mm (I) – I used a Tulip Etimo hook for this one (I have the gold metal version, which is discontinued)
Ribbed band (SC BLO ribbing)
Chain 9. Single crochet (SC) in the 2nd chain from hook and each other chain until the end of your starting chain (8 stitches). (If you would prefer a wider band, make additional starting chains before you do your first row of single crochets). Do not chain 1, turn. SC under both loops of the first stitch. SC in the back loop only (BLO) of the next 6 stitches. SC in the last stitch under both loops. Do not chain 1, turn. Repeat this for each row to your desired band size. (Should be somewhat tight as it will stretch and is meant to be under your bust like a bra band). It will need to stretch over your bust. My band had 96 rows.
Once band is at desired length, slip stitch the two halves together. I do this by folding the band in half, and starting from the working end, go in through the front loop of the first stitch and the first chain you made at the start of your work and make a slip stitch. Then go in through the front loop of the next stitch and the next starting chain, and slip stitch, all the way to the end. You can opt to turn the band inside out here if you like, but sometimes with my ribbing I prefer leaving it with the seam ridge facing out because it mimics the BLO ribbing you just created. On this top I did turn it inside out.
Body of the top/bust area
Row 1 – Chain 1 and make a round of half double crochets (HDC) around the band edge (approx 1 HDC per band row), except, depending on your own bust measurements, you may need increases. I added a total of 6 stitches by increasing 3 times under each armpit area. To increase, do two HDCs in the same row/spot. I had 102 stitches when I finished this row. If you increase, make sure to do them evenly on both sides of the top, or spread out along the entire top if you prefer. I like to hide mine under at the sides (under the armpit section). Join to the first stitch you made with a slip stitch. I prefer to mark both my first and last stitches in each round with a stitch marker. Chain 1 and turn.
Row 2 – HDC in the BLO in every HDC around. Chain 1 and turn.
Row 3 to desired top height before you begin the decreases for the straps – Repeat rounds of HDC in the BLO, where your first stitch each round goes into the last stitch from the previous round. This will keep the back seam straight. Always join each round to the first stitch with a slip stitch, then chain 1 and turn.
Repeat rows until you reach your desired height for the body of the top, before the straps start. This will vary depending on how deep a neckline you prefer. I recommend trying on as you crochet. I did 14 rounds (15 including the first round of regular HDC into the band). Cut and fasten off when you are finished with this part.
Straps
Once I felt my top covered my bust area properly and was ready to start working on the straps, I put the top on, and used stitch markers to mark where I wanted the straps to begin. It helps to put on the bra you are wearing underneath the top, if you are wearing one, to ensure full coverage over it. For me – I marked off 16 stitches at each breast. I joined my yarn to one of these marked stitches, and worked the same HDC BLO pattern with a total of 12 decreases (2 decreases per row) down to just 4 stitches for the width of the straps. Remember to work on the correct side of the top so you are continuing the pattern. So for the first row – HDC BLO 2 together (1 decrease made), HDC BLO 12 stitches, and HDC 2 together (2 decreases made) – total of 14 stitches. Chain 1, turn, and repeat this process for 5 additional rows, ending with 4 stitches for the last row. Then repeat the 4 stitch pattern for every row until your strap is at the length for your body (try on as you go, and test by attaching the edge of the strap with stitch markers to the back to ensure proper fit). Once they are at the length you prefer, cut and fasten off, leaving a long enough tail to sew (I use a mattress stitch) the edge of the strap to the back of your top. My straps had 23 rows of 4 HDC BLO when they were at the right length for me.
Repeat the same process for the second strap.
Border
Once the straps are complete and sewn to the back of the top, I used this pattern from My Sweet Potato for the border around the entire top.
Be sure to weave in all of your ends. If you’re using acrylic yarn like I did, you may not need to block the top (I did not). Other yarn fibers will probably need some blocking.
I hope you’ve enjoyed both of these tutorials and are inspired to try making this set for yourself!
Disclosure: Some links in this post are affiliate links. Full disclosure in sidebar.


Leave a comment